Sunday, March 13, 2011

I Need Hair Help Ladies!! Please Give Me Your Opinion Please.


I have been wanting to get a new hair style for quite a while. Now that I am fixing to start a new career in the beauty industry I really need to get a new style. I have some ideas about what I like and what looks good on me, but I can be so indecisive. So, I need some help making a final decision.


#1
I love everything about this cut, but not sure I'm ready to go this short.


#2
I love the length of this cut, but I hate how the layers frame the the face. I like the bangs.


#3
I love the sides and cut of the bottom, but I don't like how short the bangs are. Again, not sure if I want to go this short.


#4
I love the bangs and the color.


#5
I love everything about this style. Love the color.


#6
I love the sides and back of this cut. I like the side part, but the bangs are to long for my five head.


#7
I love the long part of this cut and I love the color. I hate the bangs.


#8
I love this cut. I prefer the bangs from style #1, 2, or 4.

Continue reading...

Tuesday, March 8, 2011

How To Turn Your Bathroom Into A Spa


I had a looong week at Aveda this past week. We attend school from Tuesday through Saturday. It's five days a week, which is fine, but starting the week on Tuesday instead of Monday has totally threw me off balance. So Sunday night I treated myself to the best at home spa experience ever. Here's how I did it...

Things you will need:
CD player
Relaxing CD
Lots of Candles
Lighter
Body Lotion
Large Pillow
Favorite Bath Salts, Bath Oil, Bubble Bath, Body Wash, Body Scrub, Body Lotion, Face Mask
Shaving Lotion & Razor
Pumise Stone
Favorite Relaxing Essential Oil (Cedar, Chamomile, Frankincense, Jasmine, Lavender, Marjoram)
Piece of Terry Cloth (I use an old wash cloth I cut into pieces)
3 Towels, Robe, Underwear, PJ's, Cotton Socks
Plastic Tote w/ Lid
Chamomile Tea & Favorite Tea Cup
Your HG Facial Cleanser, Exfoliant, Toner, Treatment, Eye Cream, Night Cream
Clarisonic Brush or Hand Held Round Facial Brush


You really need to prepare your bathroom:
  • Start off with a clean bathroom. If your tub is needing attention do that first.
  • Bring in a portable CD player w/ your favorite spa music. My favorite CD is Musical Massage, it's a 3 disc set.
  • Set up your candles all around the room. The more the better. Don't light them just yet.
  • Make sure the lid is down on the toilet. We will use this as a place to sit and apply our favorite body lotion. Place your favorite body lotion on the back of the toilet.
  • Place a large pillow on the floor, and place 2 or 3 candles around it. This will be a place for us to meditate and relax before we get in the tub.
  • Gather up any of your favorite bath salts, bath oils, bubble bath, and body wash and put them around the tub.
  • Get three fluffy towels, pj's, cotton socks, and robe. Put them in the dryer on high heat for about 15 min. If you have a favorite calming essential oil (cedar, chamomile, frankincense, jasmine, lavender, marjoram) dab a bit onto a piece of terry cloth and throw it in the dryer with your towels and clothes. Aromatherapy at it's best.
  • Have a plastic tote with a lid handy to put the towels, pj's, cotton socks, robe, and cotton ball w/ essential oil directly in after you get them out of the dryer. The sealed tote will help keep the heat and lovely smell in through out your bath.
  •  Start your bath water. Make sure the water is warm enough, but not so hot that you are uncomfortable and can't wait to get out.
  • Make yourself a cup of hot chamomile tea and set it by the bathtub.
  • When your bath water is done, light the candles, pour in bath salts/bath oil, and turn on the music. Don't forget to press repeat on your CD.
  • Go get your towels and clothes out of the dryer, quickly fold the towels and put them in the tote. You may want to add more of the essential oil to the terry cloth piece and put it into tote.
  • Place your tote near your bath tub.
  •   Lock the door to your bathroom and turn the lights off. No interruptions!


Relaxation Time:

  • Undress and put your warm robe on.
  • Apply your favorite face mask. I love the Queen Helen Mint Julep Mask.
  • Sit which ever way is comfortable on the pillow and take some slow deep breaths. Try to clear your mind and focus on your breathing. I do this for about 10-15 minutes.
  • Take off your robe. If you like to use a body scrub. Now's the time to do it. Go ahead and scrub up before you get in the tub. Applying the scrub to dry skin helps it to exfoliate better.

  • Go ahead and get in the bathtub. If you used a bath oil and/or body scrub prior, be very careful getting in. The bath oil and/or body scrub will make your feet ultra slippery.
  • Lay back and relax. Sip your tea and enjoy the atmosphere you created for yourself. Take deep breaths and take your time.
  • When you are ready go ahead and wash up. Don't forget to shave those legs. Nothing feels better than getting in bed with silky smooth legs.
  • Sit on the side of the tub and take care of your feet. I like to use a pumice stone to remove any dead skin.
  • Time to get out. Take the lid off your tote and rap up in one of your yummy warm towels.
  •  Grab your cotton socks. 
  •  Place another of the warm towels on the toilet lid.
  • Have a seat and grab the lotion off the back of the toilet and slather up. Don't forget your feet.
  • Put on your cotton socks.
  • Rap up in your robe.
  • Remove your face mask at the sink.
  • Continue with your nightly face routine. I love to bring out the micro-derm abrasion for a special treat. Don't forget when you are doing your face, what ever treatments and moisturizers you use on your face you should also use on your neck, chest, and hands. These areas age the fastest and have the same skin thickness.
  • Put on your warm pj's and blow out your candles.
  • Head straight for the bed.
  • Get ready for the best rest you've had in months.
Good night! ZZzzzzzzzZZZzzzzzzZZZZzzzzzZZZZZZzzzzzzzZZZZZ : )


Continue reading...

Monday, February 21, 2011

Wet n' Wild Comfort Zone 8 Color Palette- Review, Dupes & Swatches


Ladies, I am absolutely blown away with this palette. I cannot believe that I purchased such high quality eye shadows from Walgreen’s for $5. Every single eye shadow in this palette has the most highly pigmented color pay off with a buttery soft texture. The color that you see in the pan is exactly what you see when you apply it on your eyes. The soft texture makes blending effortless. This palette truly amazes me. It makes me wonder why more expensive brands are lacking this type of quality while their eye shadows cost 3 times as much, or more.

The Comfort Zone Palette contains 4 warm neutral tones on the left side, varying from a warm cream to a bronzed black. The 1st shade on the left is a frosted golden cream shade. The 2nd shade on the left is a frosted medium toned warm golden bronze. The 3rd shade on the left is a medium frosted bronzed brown shade. The 4th shade on the left is black with bronze shimmer. The first 3 shades on the left remind me of a MAC Veluxe Pearl texture and MAC Frost finish. The 4th shade on the left reminds me of a MAC Veluxe Pearl texture with a MAC Style Black (Cinderfella, Guilt by Association, Blue Flame, & Young Punk) type finish, but with better color payoff and less glitter fallout.

Then on the right side you have 3 various warm shades that coordinate with the beautiful medium toned frosted sage green shade. The 1st shade on the right is a medium toned frosted taupe with brown undertones. The 2nd shade on the right is a medium toned frosted sage green. The 3rd shade on the right is a black with gold shimmer. The 4th shade on the right is a warm medium brown with green duo chrome. The 1st, 2nd, and 4th shades on the right remind me of a MAC Veluxe Pearl texture and a MAC Frost finish. The 3rd shade on the right reminds me of a MAC Veluxe Pearl texture, but with MAC’s Guilt by Association finish, but softer texture and a more pigmented black.


Now on to the dupes…Some of these shades are exact dupes for some MAC shades. However, not all of them are exactly the same variation of the shade, but I promise once you apply it and finish your eye look no one will be able to tell the difference.

Left Side- Top to Bottom
#1- MAC Dazzlelight
#2- MAC Woodwinked
#3- MAC Go!
#4- There wasn’t a bronze shade in the MAC Style Black collection, but this would have been it.

Right Side- Top to Bottom
#5- Patina with a slightly more frosty finish
#6- Juxt with a more vibrant golden green finish
#7- Guilt by Association
#8- Club


Now that I have bragged and bragged about this palette until you probably can't stand it anymore. Let me tell you the single thing about this palette that is slightly disappointing me. There are no matte shades in this palette. This palette is not totally inclusive of all the shades I would need for travel. I feel the exact same way about the Naked Palette by Urban Decay. With both of these palettes, I would still need a matte highlight shade and a matte dark brown or black for my crease and outer V. However, I do realize not everyone likes to do their makeup exactly like I do mine. So, if you you love a totally shimmery eye look or your like me, and don't mind packing an extra single quad for your matte shades the Comfort Zone palette is still a great drugstore find for travel. 

Just a note for you, if you decide to purchase the Comfort Zone palette as well as the I’m Getting Sunburned Trio you will have two of the same single eye shadow colors. The 4th shade on the left of the Comfort Zone palette is the same shade as the 2nd shade in the I’m Getting Sunburned Trio.


Continue reading...

Life Journal Vlog: A New Chapter Of My Life....


As you all know I will be starting my esthiology training at Aveda Institute tomorrow. I'm very excited to being this new chapter of my life. My life has been so rewarding so far. I have so much to be proud of. I have a wonderful husband, a fulfilling marriage, and two beautiful children, to which I have dedicated the past 10 years to. I put my career on hold so that I could focus all of my attention on my family. Do I regret it? Not in a million years. Without them I could never as happy as I am today. They are everything to me. I would do it all over again in a second. There is nothing more important to me, so I saw no reason not to solely focus on them. Just as much as I have given to them, I have received back 10 times more. It fills my heart to see my children happy and growing and learning, and everyday becoming more intelligent, loving, and mature. Then to look at my husband, and even though years have past, we both still get butterflies in your stomach when he comes home from work. There is nothing in the world like this.

To make a long story short, I feel that my life is just about whole. The only exception is the way I feel about myself on the level of personal success. I married very young so since then I was known as Jeff's wife. Much later my first child was born, then I was known as Blaine's mom. Then along came my daughter, then I was know as Jillian's mom. What I'm trying to say is, it has been to long since anyone associated me with being an individual. Just being myself. It may seem selfish to some but, I want something to be proud of that is just about me.

This is were my esthiology training comes in. As everyone already knows I love everything about the beauty industry. It's more than an enjoyment or hobby to me. It's a love and a passion. Beauty is what makes me happy. Not only just products and potions, but anything beautiful whether it be a beautiful person, flower, or a beautiful smell. It all brings me happiness and uplifts my spirits. As an esthiologist I will be surrounding myself with these things everyday. Esthiology is meant for me.

So my Life Journal Vlogs will be about my journey to find my individual happiness, and all the wonderful things I learn at Aveda about what it is to be an Esthiologist. Please feel free to comment on anything you read. I learn well from others and would love to hear what you think.
Continue reading...

The Mother of All Eyeshadow Hauls!!! 13 Wet n' Wild Palettes


OMG! Everyone I went a little crazy today. I was feeling really sad with Jeff being out of town with work, and I had such a stressful day yesterday and today. So I decided to indulge in a little eyeshadow therapy. Thank goodness the nearest MAC counter is 45 miles from my house. Instead of taking a long drive, I went to down the street to Walgreen's to pick up a couple of the new Wet n' Wild eight palettes. As I was picking up the palettes I just happened to glance up the display, and to my astonishment there were more new trios!! I should have known better than to make up shop in my mood. When the damage was done I walked out with 5 trios, 2 eight palettes, and 1 six palette. Yes, that is 37 eye shadows. What can I say...? I was in a real rut. However, the amazing part is I got them all for about $30 bucks. You can't beat that with a stick. Imagine if I would have bought 37 MAC shadows...let's just say my hubby would've had to stay out of town for a couple more days to pay that bill. Anyways, I rushed home to play with my new items, and of course share them with all of you.

I will be reviewing each of the palettes I purchased on my haul. Plus, I already have a few I had purchased a while ago that I will be reviewing as well. I am going to post each of the reviews separately by palette name just for the sake of keeping it organized. Detailed reviews of each shade in the palette including swatches, and MAC dupes of each eyeshadow can be found by clicking the picture titles below. I will post a review of one of the palettes everyday for the next 13 days. So take a look at my goodies and please let me know what you think.

By the way, just to let you know, eye shadow therapy doesn't always work. You may still feel bad, but you will have some great eye shadow shades. Then when your mood brightens and you actually feel like wearing makeup, imagine the killer I looks you can create. lol : P


Wet n' Wild Silent Treatment Trio


Wet n' Wild I'm Getting Sunburned Trio


Wet n' Wild I Dream of Greenie Trio


Wet n' Wild Don't Steal My Thunder Trio


Wet n' Wild Cool As A Cucumber Trio


Wet n' Wild Petal Pusher 8 Color Palette


Wet n' Wild Pride 6 Color Palette


These are ones I already had....


Wet n' Wild Walking On Eggshells Trio


Wet n' Wild Knock On Wood Trio


Wet n' Wild Vanity 6 Color Palette


Wet n' Wild Lust 6 Color Palette


Wet n' Wild Greed 6 Color Palette


Continue reading...

Monday, February 7, 2011

China Glaze Shower Together Nail Polish Review & NOTD


I've had this polish for quite sometime now and for some reason I've never used it. I guess that is just what happens when you have to many shades to choose from. Last week the gloomy, cold weather was just getting to me. I felt as yucky as it looked outside, so I decided I needed a pick me up. I took a look at my lovely display of nail polishes and instantly chose China Glaze Shower Together. After all the filing and grooming I applied 1 coat of this polish. The polish went on very easy. The formula is not too thick or thin, and applies without a brush stroke in sight. However, one coat of this polish is quite enough and it doesn't show up completely opaque. That's no bother to me, I'm a two coat kind of girl anyways. I feel no matter how great the polish looks with just one coat I must add a second coat just to be sure I get the max out of my application. So, I applied a second and it looked wonderful. I applied one coat of Seche Vite Fast Dry Top Coat which I swear by, and I was all done. Shower Together definitely did the trick for my mood as well. The shade is simply gorgeous. I would describe it as gray based teal blue color with a high shine cream finish. It's fun and modern, but still a sophisticated kind of shade.

3 Days Into My China Glaze Shower Together Mani-
I am totally impressed with this polish now. The lasting power is great. I feel that you should be able to get at least three days of wear out of any nail polish or it's not worth the money or your time and effort. I've been wearing it for 3 days now and I have only one itty bitty chip on my index finger which only happened when I rammed my finger into my cabinet door. The rest of my nails are still nice and neat. The shade is gorgeous. The formula is great on application and for lasting power. This polish is a keeper and I will be wearing this shade again.
Continue reading...

OMG! Did you see Mila Kunis' Cover on Cosmo!! Gorgie! Tutorial


As always, I am absolutely in love with Mila Kunis' makeup from the cover of Cosmo for the month of February. I am not a regular subscriber of Cosmo, but when I saw it on the shelf I was in awe. I snatch the mag up so fast it would make your head spin. lol. As soon as I got it home I started playing around with my make up so that I could recreate the look. I think I've got a pretty good version to share with you. All products are MAC unless stated otherwise. Color descriptions are in the first set of parenthesis and the dupes for the Coastal Scents Warm Palette are in the second set of parenthesis. Here is what I came up with...

      226- Apply Restless into crease using windshield wiper motions while keeping your eyes open. Start  from the outer crease and apply all the way into the inner crease.
(warm brownish/gray) (Coastal Scents Warm Plt.:Row Down/ 10  Row Over- from L to R)

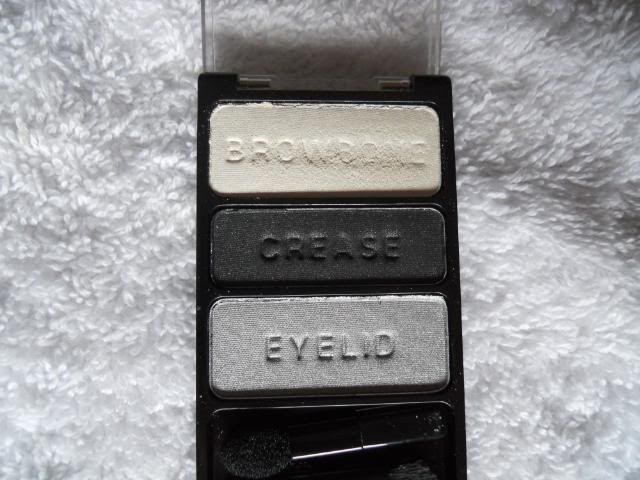
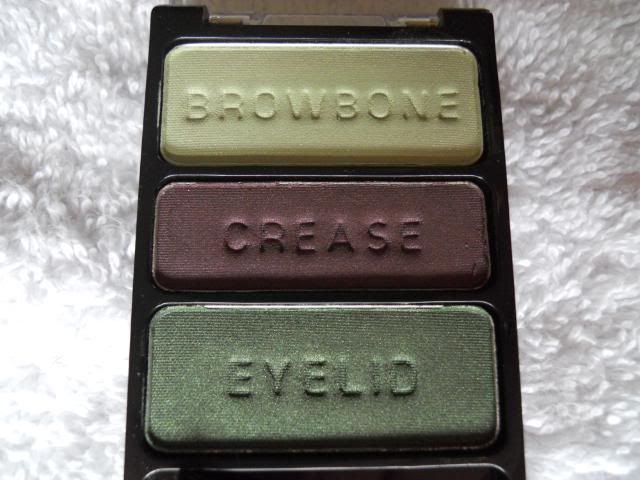
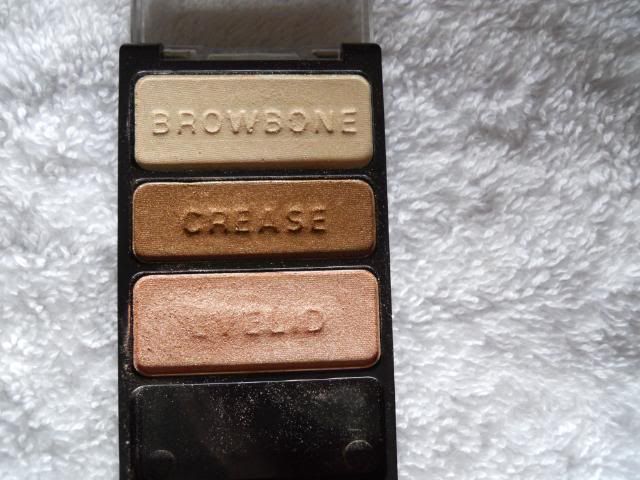
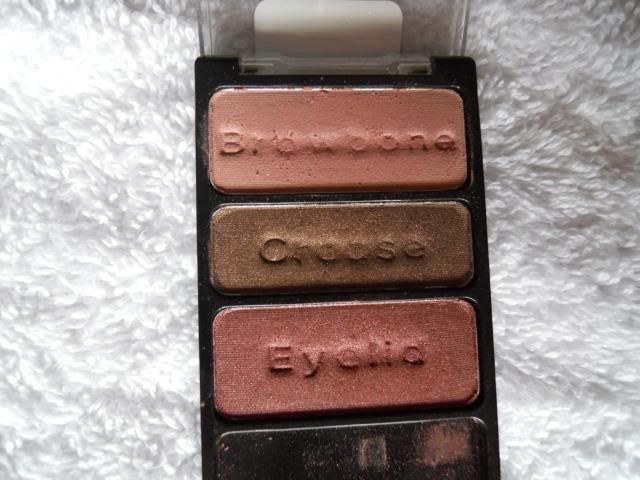
·           239- Apply Grain all over the inner ½ of the lid, up to the Restless.
(warm, light, slightly pinked, natural beige) (C. S. W. Plt.:Row Down/                   
 9  Row Over)

·       239- Apply Satin Taupe on outer ½ of the lid, up to the Restless. Wiggle the brush in side to side motions on top of the line of separation of the 2 shades to blend the colors together a bit.
(warm, slightly plumish, taupe/brown) (C. S. W. Plt.:  6  Row Down/   
 9  Row Over)

·       219- Apply Carbon on the outer V. Starting at the Lower Lash Line (LLL), and bring the color up slightly over lapping the Restless slightly in the crease, 1/4 of the way into crease only. This should create a slight cat eye effect.
(matte black) (C. S. W. Plt.:  7  Row Down/  11  Row Over)

·       217- Apply Soft Brown above Restless on top of the socket bone. The Soft Brown should slightly touch the Restless and Carbon only to blend out any harsh lines left behind from the Carbon and Restless.
(light natural warm brown) (C. S. W. Plt.:  3  Row Down/  7  Row Over)

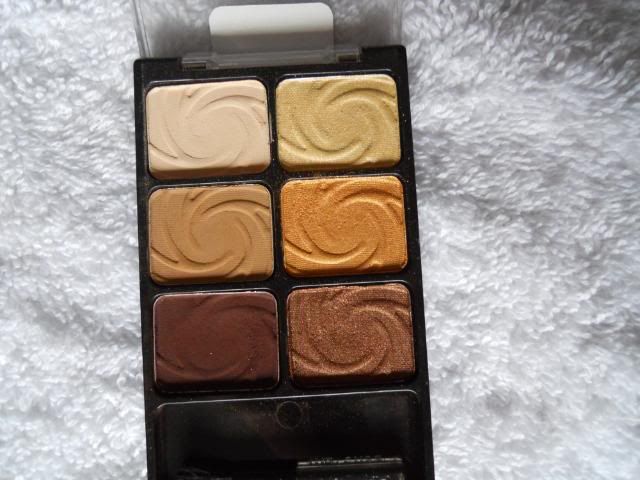
·       275- Apply Shroom under brows as a highlight. Blend Shroom out all the way down to the Soft Brown. You may use any highlight shade you like, but the shade should not be too matte or too frosty. I would definitely choose a satin shade for this look. (C. S. W. Plt.:Row Down/  5  Row Over)

·       219- Apply Nylon on the Lower Inner Tear Duct area. Any light shimmery shade will do. (C. S. W. Plt.:   3  Row Down/  4  Row Over)

        266- Apply Wet n’ Wild Black Gel Eyeliner on Upper Lash Line (ULL) start at the inner tear duct and create a thicker line than you usually would wear, add a slight wing at the corners.

·      266- Apply Wet n’ Wild Black Gel Eyeliner on Lower Water Line (LWL) going all the way into the inner tear duct area.

·      266- Apply Carbon on the LLL from the outside corner of the lashes up to the point where the lashes stop. Blend the Carbon into the lash line, so that you cannot see any flesh between the black on the water line between the Carbon on the LLL. (C. S. W. Plt.:  7  Row Down/ 11  Row Over)

·      219- Apply Swiss Chocolate on the LLL slightly over lapping the Carbon from the outside corner of the lashes all the way into the inner tear duct area.  
(C. S. W. Plt.:Row Down/  10  Row Over)

·       1 coat of MAC Zoom Lash and 2 coats of L’oreal Voluminous. A set of very natural looking lashes would look great. A set of corner lashes would look even better.

·       Apply foundation- I used NARS Sheer Glow and the Sigma F80/Flat Top Synthetic Kabuki to apply mine.

·       Apply concealer- I used a Sigma’s version of the 224 and Benefit’s Erase-A-Paste Concealer in light.

·       Apply a matte bronzer under cheek bones as a contour. Also, bronze the temple & jaw line a bit as well, using the “3 application technique”. This is to start at the jaw line and swoop your brush up in a half circle motion up to the temple. Then repeat at the jaw line and swoop your brush down in a half circle motion down on the jaw line. I used my Mark Bronzer.

·       Apply Peaches Blush only to the cheek bones. For this look you will need to leave the apples bare. The center parts of the face and under the eyes need to be very naturally light looking. Any warm peach blush will do.

·       Apply a nude lip liner

·       Apply a peachy nude lipstick. I used Rimmel Moisture Renew Lipstick in Spotlight Beige.

 I always suggest applying your foundation after you do your eye when using darker shades. This way the fall out doesn't ruin the look of your foundation.

 I hope you enjoyed it, and will play around with it. I plan on wearing this look tomorrow for a special outing with my hubby. We will be celebrating our Valentine's Day tomorrow instead of on the 14th because he will be out of town working then.

·    
Continue reading...

Followers


Tiffany L. Prevost Esthetician & Makeup Artist Copyright © 2009 Cosmetic Girl Designed by Ipietoon | In Collaboration with FIFA
Girl Illustration Copyrighted to Dapino Colada